Irkngthand sits in the northeast corner of Skyrim, hidden in the snowy mountains west of Winterhold. This Dwemer ruin isn’t just another forgotten dungeon, it’s the climactic stage for one of the Thieves Guild’s most intense quests. Players who venture here will face challenging enemies, navigate flooded chambers, and confront a memorable boss fight that literally brings the house down.
Most adventurers first encounter this location during “Blindsighted,” but the ruin holds value beyond that single questline. Dwemer ruins always pack worthwhile loot, and Irkngthand delivers with its collection of soul gems, enchanted gear, and architectural puzzles. Whether you’re following Karliah’s trail or just exploring Skyrim’s northern reaches, knowing what to expect here can mean the difference between a smooth run and a frustrating slog through waterlogged corridors.
Table of Contents
ToggleKey Takeaways
- Irkngthand is located in Skyrim’s northeast mountains west of Winterhold and serves as the climactic stage for the Thieves Guild’s “Blindsighted” quest, featuring challenging enemies, puzzles, and a memorable boss fight against Mercer Frey.
- Prepare with shock damage weapons for Dwemer constructs, waterbreathing potions for flooded chambers, and at least 20 lockpicks to fully explore the dungeon’s numerous locked containers and hidden loot.
- The Eyes of the Falmer and the Skeleton Key are the most valuable rewards in Irkngthand, worth a combined 5,000+ gold and providing unbreakable lockpicking until returned during a later quest.
- Dwemer mechanisms, soul gems, and enchanted gear throughout Irkngthand make this ruin one of Skyrim’s most lucrative dungeons, yielding 4,000-10,000 gold in total loot from a thorough exploration.
- Use the Aura Whisper shout or Detect Life spell during the Mercer Frey boss fight to counter his stealth abilities and maintain visibility while managing his paralysis poison attacks.
- The tonal lock puzzle requires activating resonators in a middle-bottom-top sequence, and the flooded Grand Cavern sections can be navigated safely with proper preparation and waterbreathing effects.
Where to Find Irkngthand and How to Get There
Exact Map Location and Landmarks
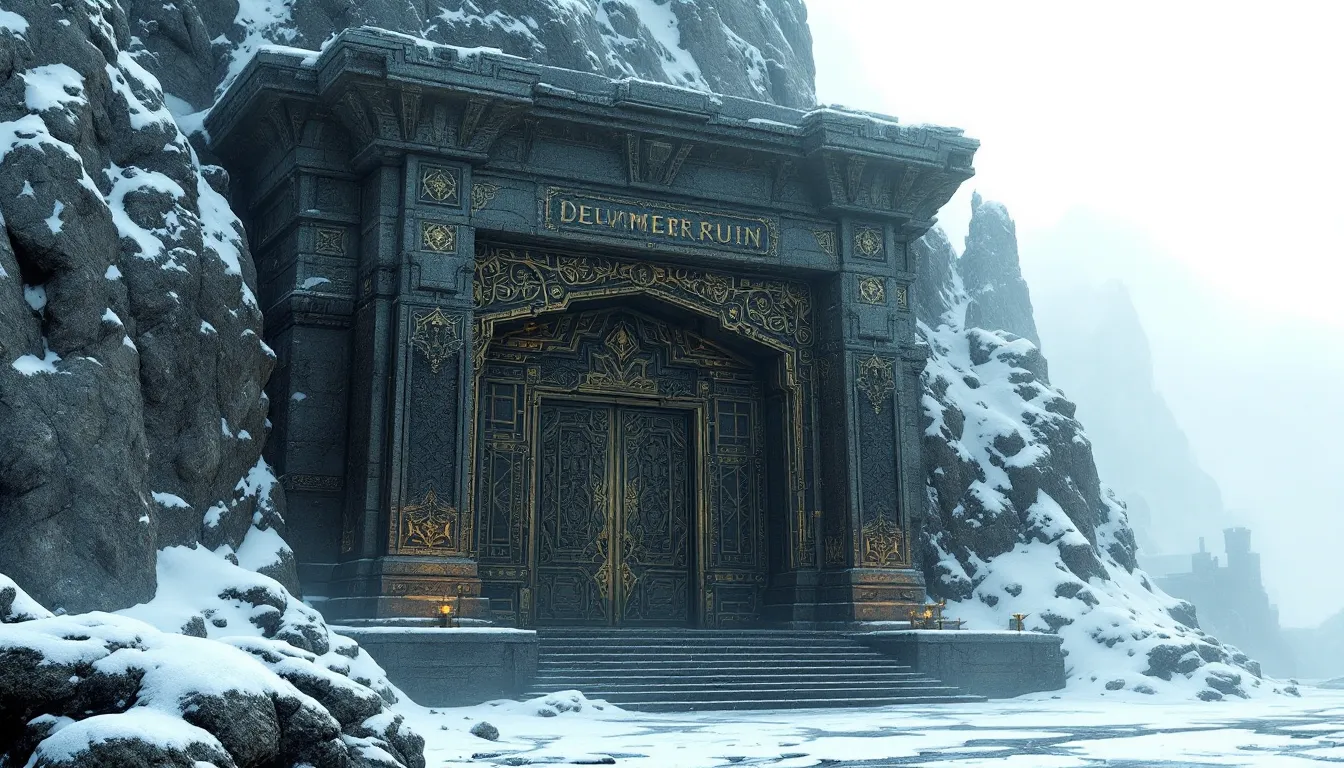
Irkngthand sits in the northeastern mountains, directly west of the College of Winterhold. The entrance is built into a rocky cliff face at coordinates roughly 32,17 on the game’s map grid. Two stone Dwemer structures mark the exterior, with the main door positioned between them.
The ruin is slightly southeast of the Shrine of Azura, one of Skyrim’s most visible landmarks. Players who’ve visited that statue can navigate southwest to find Irkngthand. The Winterhold Imperial Camp also serves as a reference point, head northwest from there and watch for the distinctive bronze Dwemer architecture against the gray stone.
No nearby settlements exist in this barren region. The closest civilization is Winterhold itself, about a half-mile east. The terrain is steep and snowy, typical of Skyrim’s northern highlands.
Best Travel Routes from Major Cities
From Winterhold, simply exit west through the city gates and follow the cliff line. The path takes about two minutes on foot. Players can fast-travel to the College of Winterhold for an even shorter walk.
Windhelm offers the next closest starting point. Take the northern road toward Winterhold, the same route that passes Whistling Mine and Fort Kastav. Once past the fort, continue north until reaching Winterhold, then proceed west. Total travel time on horseback: roughly five minutes.
From Whiterun or other central cities, the fastest route runs through Windhelm first. Alternatively, players with unlocked carriage services can hire transport directly to Winterhold for 50 gold. The carriage drops passengers inside the city, requiring only that short western walk to the ruin.
No direct fast-travel point exists at Irkngthand until players discover it. The location must be manually reached at least once before appearing on the map’s fast-travel list.
What Makes Irkngthand Important: Quest Connections
The Thieves Guild Questline: Blindsighted
Blindsighted is the only quest that explicitly requires visiting Irkngthand. This mission occurs late in the Thieves Guild storyline, after players have restored the organization’s reputation and completed major heists in Markarth, Windhelm, Whiterun, and Solitude.
The quest begins when Karliah reveals that Mercer Frey, the Guild’s former leader, has betrayed everyone. She tracked him to Irkngthand, where he’s attempting to reach the legendary Eyes of the Falmer, two enormous gems with significant monetary and historical value. Players must pursue Mercer through the ruin’s chambers, eventually confronting him in a dramatic boss encounter.
This quest is mandatory for Thieves Guild progression. Players cannot become Guild Master or complete the faction storyline without finishing Blindsighted. The quest also ties into Skyrim’s deeper lore about the Snow Elves, Dwemer, and the conflict between those ancient races.
Other Reasons to Visit This Dwemer Ruin
Beyond the required questline, Irkngthand offers several compelling reasons to explore. The ruin contains multiple Dwemer mechanisms and automaton parts, making it valuable for crafting Dwemer arrows (with the Dawnguard DLC) or collecting materials for smithing.
Players seeking rare loot will find enchanted weapons, soul gems (including a guaranteed Grand Soul Gem), and gold scattered throughout the chambers. The Falmer enemies drop decent armor and weapons, while the Dwemer constructs yield valuable scrap metal.
For lore enthusiasts, Irkngthand presents environmental storytelling about the fall of the Dwemer and the corruption of the Snow Elves into Falmer. Players using proper Skyrim techniques can uncover details about the relationship between these civilizations through careful exploration.
Preparing for Your Journey: Recommended Level and Gear
The game recommends level 20+ for Irkngthand, though the actual difficulty scales somewhat with player level. Most adventurers reach this dungeon around level 25-30 during normal Thieves Guild progression, which feels appropriately challenging without being overwhelming.
Bring plenty of lockpicks. The ruin features multiple locked doors and chests, many at Expert or Master difficulty. Players with low Lockpicking skill should stock up, expect to use 10-15 picks minimum if you’re not save-scumming attempts.
Potions of Waterbreathing prove essential for the Grand Cavern section. The flooded chambers require extended underwater navigation, and while air pockets exist, having waterbreathing active eliminates stress and allows thorough exploration. Craft these beforehand using Salmon Roe and Nordic Barnacles, or purchase from alchemists.
For combat, prioritize shock damage weapons or spells. The Dwemer Spheres and Centurions have high resistance to physical damage but are vulnerable to electricity. Mages should prepare Lightning Bolt or Chain Lightning. Archers benefit from bringing shock-enchanted arrows or carrying a backup enchanted bow.
Falmer are weak to fire, so having both shock and flame options covers all enemy types. A weapon with soul trap lets players refill soul gems from the abundant enemies here. Stealth characters should pack invisibility potions, the boss encounter allows for sneaky bypasses that trivialize certain mechanics.
Bring at least 10 healing potions and stamina restoration items. The final sections involve significant combat, and running out of health recovery mid-boss-fight creates problems. Weight management matters too, clear inventory space for the valuable loot you’ll extract.
Navigating the Irkngthand Sanctuary
Key Enemies and Combat Strategies
The Sanctuary serves as Irkngthand’s entrance zone. Players immediately encounter Falmer patrolling the initial chambers, typically 2-3 at a time. These enemies have good hearing but rely primarily on sound detection, making stealth approaches viable.
Frostbite Spiders inhabit several rooms, often dropping from ceiling positions. They’re weak but can apply poison damage that stacks annoyingly. Fire or AOE spells clear spider groups efficiently.
The first Dwemer Centurion appears in the Sanctuary’s lower level. This hulking construct hits hard with steam attacks and melee strikes. Kite it around pillars while applying shock damage. Don’t stand directly in front, its steam blast has range and deals significant damage. Players who struggle with the Centurion can use the doorway as a chokepoint, retreating to heal while it slowly follows.
Stealth builds can bypass most Falmer encounters here. Stick to shadows, use Muffle if available, and remember that Falmer don’t react to light sources the way surface enemies do. The Centurion, but, has detection mechanics that make stealth less reliable.
Important Loot and Items to Collect
The Sanctuary contains several soul gems in display cases and on shelves. A Greater Soul Gem sits near the entrance chamber’s alchemy station. Don’t rush past the side rooms, one contains a chest with leveled enchanted gear.
An Alchemy Lab in the eastern section lets players craft potions using ingredients found throughout the zone. The nearby shelves hold Dwemer oil, gears, and scrap metal. Collect these if you’re crafting Dwarven gear or arrows.
One room features a trapped Falmer chest connected to a pressure plate. Disarm the pressure plate before opening, or stand to the side, the trap releases a swinging mace. The chest typically contains 100-200 gold plus random loot.
Check corpses thoroughly. Some dead adventurers in the Sanctuary carry lockpicks, gold, and occasionally skill books. The Sanctuary’s layout includes vertical elements, so explore upper ledges and platforms for hidden loot stashes.
Exploring the Grand Cavern
Solving the Tonal Lock Puzzle
The Grand Cavern presents Irkngthand’s signature puzzle: a Dwemer tonal lock blocking progress deeper into the ruin. This mechanism requires players to align three resonators to match specific tones.
The puzzle solution is middle, bottom, top when reading the resonators from your viewing position. Activate each resonator in that sequence, and the gate opens. The game doesn’t explain the logic clearly, but the pattern follows the arrangement of symbols on the nearby pillars.
If players mess up the sequence, simply reset by re-activating the central control mechanism. There’s no penalty for wrong combinations except lost time. Players who completed earlier Dwemer ruins or read the guide content covering these puzzle types will recognize the pattern.
Karliah accompanies players during the Blindsighted quest and provides dialogue hints. Listen to her comments, they nudge toward the solution without explicitly stating it. Solo visitors (post-quest) must solve it independently, but the resonators are clearly marked.
Navigating the Water-Filled Sections
After the tonal lock, the path descends into flooded chambers. This is where Waterbreathing potions become critical. The underwater sections connect multiple rooms, with air pockets scattered throughout.
The main underwater route follows a straightforward path: dive down, swim through the archway, follow the corridor to the left, then ascend through an opening in the ceiling. Falmer swim in these areas, though they’re less aggressive underwater. Avoid combat if possible, fighting while managing air is tedious.
Loot exists underwater. Look for Dwemer chests embedded in the walls and floor. One contains a leveled enchanted weapon. The visibility is decent, but using Candlelight or other light sources helps spot containers.
The water eventually leads to a large open cavern with platforms. Surface here to find more Falmer and a Chaurus. The Chaurus hits harder than standard Falmer and applies poison. Ranged attacks work best, kite it around the platforms while maintaining distance.
Players applying advanced strategies can use the Become Ethereal shout to ignore water physics temporarily, speeding through these sections without worrying about air. The shout’s cooldown is long, so time it for the longest underwater stretch.
The Slave Pens: What to Expect
The Slave Pens zone represents the transition between Irkngthand’s exploration sections and the final confrontation. This area is smaller but dense with enemies and loot.
Falmer density increases here. Expect groups of 3-4 patrolling together, often supported by Chaurus pets. The pens are arranged in cells, creating tight corridors that make AOE spells effective. Fire Storm or Chain Lightning can clear entire clusters if positioned correctly.
Several Falmer Gloomlurkers appear, the stronger variant with better armor and weapons. They deal more damage and have higher HP pools than basic Falmer. Prioritize them in group fights to reduce incoming DPS.
Loot-wise, the Slave Pens contain Falmer huts with miscellaneous items. Most huts hold Chaurus eggs (good alchemy ingredients), Falmer ears, and small gold stashes. One hut conceals a chest with leveled loot, check behind the cloth hangings.
The zone includes another Dwemer Centurion encounter. This one patrols a central chamber and activates when players approach the far exit. The room provides more space than the Sanctuary’s Centurion fight, allowing better kiting. Use the broken pillars as cover against steam attacks.
A unique piece of loot here: Sapphire Claw, sometimes present depending on quest state and player progression. This decorative item has value purely for selling, no puzzle application like dragon claws.
Karliah stays active during Blindsighted, providing ranged support. Let her draw aggro if you’re struggling with the Centurion, her bow attacks distract it while you flank. She can’t die, making her a reliable tank for difficult pulls.
Before leaving the Slave Pens, ensure your health, magicka, and stamina are full. Stock your hotkeys with best potions and gear. The next zone transitions directly into the boss encounter with limited preparation time.
Facing Mercer Frey: Boss Fight Walkthrough
Combat Tips and Tactics
Mercer Frey fights like a high-level rogue with maxed stealth skills. He wields the Skeleton Key, which grants him abilities beyond normal NPCs. The fight occurs in the Eyes of the Falmer chamber, a room that becomes increasingly dangerous as the battle progresses.
Detect Life or Aura Whisper shout are game-changers here. Mercer frequently enters sneak mode and becomes invisible, repositioning for backstabs. The Aura Whisper shout reveals his position even while hidden, eliminating his stealth advantage. Mages can cast Detect Life continuously to maintain vision.
He hits hard with dual-wielding attacks and applies paralysis poison on some strikes. Keep healing potions hotkeyed. If paralyzed, button-mash through the menu to chug a health potion before his next strike connects.
Mercer’s AI prioritizes high-damage opportunistic strikes. Don’t let him get behind you. Keep mobile, use the room’s statues as obstacles, and maintain awareness of your positioning. He’ll sometimes hang back and use a bow, close distance quickly when this happens.
Karliah and Brynjolf accompany players during Blindsighted. Let them absorb some aggro, but don’t rely on them for damage. They’ll chip away at Mercer’s health, but players need to deliver the bulk of the DPS.
Follower tip: If you brought a personal follower beyond the quest companions, they can create a 3v1 situation that trivializes the fight. Mercer struggles against multiple attackers and can’t stealth effectively.
Poison your weapons before engaging. Lingering Damage Health poisons are ideal, they’ll continue ticking even when Mercer goes invisible, helping track his position and maintaining DPS uptime.
Escaping the Flooding Chamber
Once Mercer’s health drops to zero, the chamber begins flooding. This is a timed escape sequence, though the timer is generous, about 60 seconds.
The water rises from the floor. Immediately swim upward toward the ceiling. An exit tunnel appears in the upper section of the room. It’s marked clearly but easy to miss in the chaos. Look for the bright opening with rushing water flow.
Players who obtained essential tips know to activate any Waterbreathing effects before Mercer dies. This removes stress from the escape entirely. Without Waterbreathing, manage your air carefully, there’s enough time to reach the exit before drowning, but panic leads to swimming in circles.
Swim through the tunnel. It’s a short, straightforward path that leads to an outdoor exit. No enemies block the route. Players using the Become Ethereal shout can ignore water physics during the escape, reaching the exit almost instantly.
The exit dumps players outside Irkngthand, on a ledge overlooking Bronze Water Cave. From here, fast-travel is available. Brynjolf and Karliah will be standing nearby, waiting to conclude the Blindsighted quest dialogue.
Don’t forget to loot Mercer’s corpse before the water rises too high. He carries the Chillrend sword (leveled, but powerful), around 2,000-3,000 gold, and the Skeleton Key (which serves as an unbreakable lockpick until returned during a later quest). Grabbing his loot is possible even during the flood, just be quick.
Valuable Loot and Rewards in Irkngthand
Irkngthand ranks among Skyrim’s most lucrative dungeons for players who thoroughly explore every chamber.
The Eyes of the Falmer are the headline reward. These two massive gems sit on a Dwemer statue in the boss chamber. Each eye is worth 2,500 gold, totaling 5,000 for the pair. Sell them to fences in the Thieves Guild for best prices, general merchants won’t have enough gold to cover the transaction in one sale.
Chillrend from Mercer’s corpse is a unique leveled sword. At level 46+, it’s one of the strongest one-handed weapons in vanilla Skyrim, with 30 points of frost damage and a chance to paralyze. Lower-level versions are weaker, so players who clear Irkngthand early might consider returning later for an upgraded version through console commands or mods available at Nexus Mods.
The Skeleton Key remains in your inventory until you return it during the Thieves Guild quest “Darkness Returns.” While holding it, players have an unbreakable lockpick. Many players delay returning it indefinitely to maintain this benefit, as the quest reward (a choice between three lesser powers) doesn’t compare to unlimited lockpicking.
Soul gems are abundant. Expect to collect 5-6 filled soul gems (mostly Common and Greater), plus several empty ones. The Grand Soul Gem in the Sanctuary is guaranteed.
Dwemer artifacts include multiple pieces of Solid Dwemer Metal, Large Dwemer Struts, Bent Dwemer Scrap Metal, and Small Dwemer Levers. These materials are heavy but valuable for smithing Dwarven gear. The metal alone is worth significant gold when sold.
Enchanted gear spawns in several chests throughout the dungeon. Exact items depend on player level, but expect to find enchanted armor pieces and weapons. The underwater chests in the Grand Cavern are easy to miss, they often contain the best enchanted drops.
Gold accumulation: A thorough clear of Irkngthand yields 4,000-6,000 gold when selling all loot (including gems, Dwemer scrap, and enchanted items). This doesn’t include the Eyes of the Falmer, which add another 5,000.
Minor valuables like Flawless gems (sapphires, rubies, emeralds) appear in Falmer huts and chests. These are lightweight and worth 250+ gold each, making them ideal for players near carry capacity.
Common Mistakes to Avoid
Forgetting Waterbreathing potions tops the list. Players who reach the Grand Cavern without water-breathing capability face frustrating drowning cycles. The underwater sections aren’t optional, you must navigate them to progress. Stock up before entering or brew potions from the Sanctuary’s alchemy station.
Underestimating the Centurions gets players killed frequently. These constructs deal massive damage, especially at lower levels. Don’t face-tank them. Keep distance, use shock damage, and exploit line-of-sight breaks. Standing still while trading blows is a quick path to the respawn screen.
Missing the Eyes of the Falmer happens more than it should. After killing Mercer, players panic during the flood sequence and forget to loot the statue. Take three seconds to grab both gems before swimming to the exit, they’re worth 5,000 gold combined.
Not maintaining lockpick inventory causes problems. Irkngthand has 15+ locked containers, many at Expert or Master difficulty. Players who run out of lockpicks mid-dungeon must either skip loot or backtrack to find more. Bring 20+ picks to ensure coverage.
Ignoring the Skeleton Key’s utility is a meta-game mistake. Some players immediately return the key after Blindsighted without realizing its benefit. Consider keeping it until you’ve maxed Lockpicking skill or finished most of the game’s locked content. The Thieves Guild powers you get for returning it are underwhelming by comparison, as detailed in various game guides.
Fighting Mercer without preparation makes the boss fight unnecessarily difficult. Fill all potions, apply poisons to weapons, and ensure best gear is equipped before entering the final chamber. Use the Slave Pens as your staging area, heal, restock, save manually.
Rushing the tonal lock puzzle wastes time. Players who spam-click resonators without thinking create confusion. Take a moment to examine the mechanism. The solution is straightforward once you understand the pattern.
Leaving without thorough exploration costs gold. Many players complete Blindsighted and exit immediately, missing half the dungeon’s loot. Backtrack through cleared areas, check underwater sections carefully, and open every container. The time investment pays off in thousands of gold.
Conclusion
Irkngthand delivers one of Skyrim’s most memorable dungeon experiences. The combination of environmental puzzles, underwater navigation, and a climactic boss fight makes it stand out among the game’s dozens of ruins. The Blindsighted quest brings players here at a natural progression point where the challenges feel appropriately scaled.
The loot justifies the effort. Between the Eyes of the Falmer, Chillrend, the Skeleton Key, and abundant Dwemer materials, a full clear generates significant wealth and useful gear. Players who explore thoroughly and prepare properly will find this ruin rewarding both mechanically and narratively.
For returning players or those who’ve completed the Thieves Guild line, Irkngthand remains worth revisiting. The dungeon respawns enemies and loot after 10 in-game days (standard for cleared dungeons in Skyrim), making it farmable for Dwemer materials and soul gems. The location’s northern setting also makes it a convenient stop when traveling between Winterhold and other northeastern locations.
Whether you’re pursuing guild mastery or just hunting for valuable Dwemer ruins to plunder, Irkngthand delivers the goods.