Fifteen years after its release, Skyrim continues to dominate the cosplay scene at conventions worldwide. The game’s diverse armor sets, iconic factions, and memorable characters provide endless inspiration for crafters looking to bring Tamriel to life. Whether someone’s aiming to recreate the imposing presence of Daedric armor or the subtle elegance of Nightingale gear, Skyrim cosplay offers challenges and rewards for builders at every skill level.
This guide covers everything from selecting a character and sourcing materials to building armor pieces and showcasing finished work. Cosplayers will find specific techniques, budget-friendly alternatives, and insights drawn from over a decade of community builds. The goal isn’t just to wear a costume, it’s to embody the world that’s captivated millions of players since 2011.
Table of Contents
ToggleKey Takeaways
- Skyrim cosplay remains one of the most accessible cosplay options because its design aesthetic embraces weathering and imperfection, allowing builders of any skill level to achieve impressive results.
- Choosing the right character is the foundation of a successful Skyrim cosplay—from iconic armor sets like Daedric and Nightingale gear to playable races that influence makeup and prosthetics decisions.
- EVA foam and thermoplastics like Worbla provide the core materials for armor building, while affordable alternatives from hardware and craft stores can significantly reduce project costs without sacrificing quality.
- Effective Skyrim cosplay assembly requires careful patterning, proper heat-shaping techniques, and layered detailing that separates adequate builds from impressive convention-ready costumes.
- Quality photography, convention etiquette, and community engagement through social media and group collaborations transform finished Skyrim cosplay projects into shareable experiences that inspire other builders.
- Starting with visible core pieces like chest plates and helmets, then expanding gradually, allows budget-conscious cosplayers to build impressive costumes without overwhelming financial investment or material waste.
Why Skyrim Cosplay Remains a Fan Favorite After 15 Years
Skyrim’s enduring popularity stems from its instantly recognizable visual design. The armor sets, weapons, and character aesthetics are distinct enough to stand out in a crowded convention hall, yet detailed enough to reward close inspection. Unlike some franchises that require constant updates to stay relevant, Skyrim’s design language has remained consistent, meaning a cosplay built in 2012 is just as valid as one crafted today.
The game’s modding community has also kept interest alive. Modding communities continue to produce high-resolution texture packs and detailed armor variants, giving cosplayers fresh reference material and new interpretations of classic designs. This constant evolution means there’s always something new to discover, even for veterans who’ve been crafting Skyrim costumes for years.
Another factor is accessibility. Skyrim’s armor designs range from simple leather sets that beginners can tackle in a weekend to complex Dwemer constructs that challenge even experienced builders. The game doesn’t demand perfection, its aesthetic embraces weathering, asymmetry, and the lived-in look of a warrior’s gear. This forgiving design philosophy makes it easier for first-time cosplayers to achieve satisfying results without years of experience.
Finally, the community itself drives continued interest. Cosplayers share templates, foam patterns, and build logs across forums and social media. When someone posts a new Daedric helm build or a creative take on Khajiit makeup, it sparks fresh inspiration across the community. This collaborative spirit keeps Skyrim cosplay vibrant well into 2026.
Choosing Your Character: Popular Skyrim Cosplay Options
Iconic Armor Sets and Faction Gear
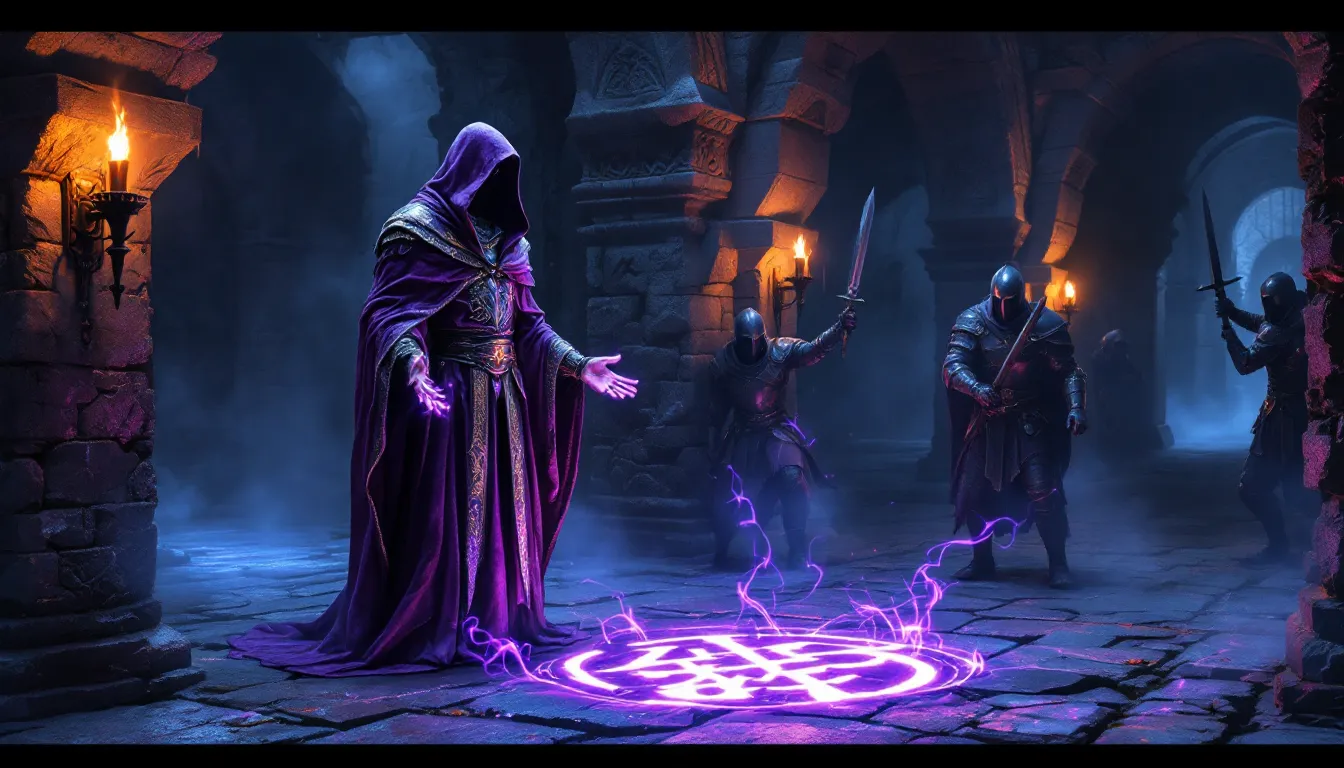
Faction armor represents some of the most recognizable Skyrim designs. The Dark Brotherhood shrouded cowl and red hand emblem are instantly identifiable, while the Nightingale armor combines elegance with a striking purple-and-black color scheme. For those seeking heavy armor, Daedric remains the gold standard, its spiked, demonic appearance makes an immediate impact, though it requires significant build time and material investment.
Dragonplate and Dragonscale armor offer alternatives that balance visual complexity with slightly more forgiving construction. The scales can be crafted from EVA foam with careful heat shaping, and the organic texture hides minor imperfections better than smooth plate designs. Imperial and Stormcloak gear provide faction-specific options that work well for group cosplays or roleplay scenarios at conventions.
For mages, the College of Winterhold robes present a different challenge. Fabric work replaces armor construction, but the intricate embroidery and layered design demand attention to detail. The Thieves Guild armor splits the difference, leather base pieces with metal accents that can be painted or fabricated depending on skill level and budget.
Playable Races and Character Builds
Race selection impacts the entire build, particularly makeup and prosthetics. Nords and Imperials require the least modification, making them ideal starting points for beginners. Khajiit and Argonians demand extensive prosthetic work or high-quality masks, but the payoff is huge, a well-executed beast race immediately stands out.
Orcs need green skin tone and prominent tusks, achievable with body paint and dental prosthetics or simple foam pieces. Dark Elves require grey skin and distinctive red eyes, typically done with body paint and colored contacts. High Elves and Wood Elves can often work with pointed ear prosthetics and subtle makeup adjustments.
Character builds influence armor choice. A stealth archer might pair Nightingale armor with the Nightingale Bow, while a two-handed warrior could rock Daedric plate with a massive warhammer. The beauty of the character-building system is that it supports countless interpretations, no two Dragonborn look exactly alike.
Notable NPCs and Quest Characters
NPC cosplays offer unique opportunities to embody specific personalities. Serana from the Dawnguard DLC remains exceptionally popular, her vampire aesthetic, distinctive hood, and character depth make her a convention favorite. Lydia, the ever-suffering housecarl, works well with standard steel plate armor and a deadpan attitude.
Ulfric Stormcloak and General Tullius provide faction leader options with distinctive armor variants. Paarthurnax and Alduin appear less frequently due to construction complexity, but dragon cosplays always draw crowds when executed well. For a lighter approach, M’aiq the Liar or various shopkeeper NPCs allow for simpler builds with strong roleplay potential.
Sheogorath, the Daedric Prince of Madness, offers room for creative interpretation with his flamboyant suit and theatrical personality. Cicero, the Dark Brotherhood jester, combines colorful costume elements with unsettling makeup for a memorable presentation.
Essential Materials and Tools for Skyrim Cosplay
Foam and Thermoplastics
EVA foam serves as the foundation for most armor builds. It’s lightweight, affordable, and forgiving for beginners. Floor mats from hardware stores (typically 10mm thick) work perfectly for base armor pieces. For finer details, craft foam sheets in 2mm or 5mm thickness allow for layered texture work and smaller embellishments.
Worbla and other thermoplastics provide structure and durability. Worbla’s Black Art is particularly useful for Skyrim armor, it’s less textured than the original, resulting in smoother finished surfaces that better replicate metal. It’s pricier than foam, so many builders use it selectively for high-stress areas like pauldrons, gauntlets, and helmet reinforcement.
Plastazote foam (LD45) works well for curved pieces like shoulder guards. It heat-forms more reliably than EVA, maintaining shape without memory foam bounce-back. Contact cement remains the go-to adhesive for foam, brands like Barge or DAP Weldwood create permanent bonds that survive convention wear.
Heat guns are non-negotiable. A quality adjustable heat gun (around 750-1000W) allows precise control when shaping foam and forming thermoplastics. Rotary tools like Dremels handle detail work, edge beveling, and battle damage effects. A sharp hobby knife or box cutter, replaced frequently, ensures clean cuts and reduces jagged edges.
Fabrics, Leathers, and Weathering Supplies
Canvas and denim work well for underlayers and practical garment construction. They’re durable enough for convention wear and accept dye readily. Upholstery fabric provides weight and structure for robes and cloaks without the cost of genuine wool. For armor strapping and attachment, heavy-duty nylon webbing and quick-release buckles allow for quick changes and adjustments.
Leather or leather alternatives add authenticity to specific pieces. Pleather (vinyl) offers a budget-friendly option that looks convincing from a few feet away. Tooling leather provides the real deal for smaller accent pieces like belts, bracers, or pouches. Technical guides for working materials often cover basic leather tooling and finishing techniques.
Acrylic paints form the basis of most paint jobs, cheap, versatile, and easy to layer. Mod Podge or similar sealers protect foam before painting, preventing paint absorption and cracking. Plasti Dip creates a flexible, durable coating that prepares foam surfaces for metallic finishes.
Weathering transforms clean builds into battle-worn gear. Black and brown acrylic washes settle into recesses, creating depth and shadow. Dry brushing with metallic silver or bronze along edges simulates wear and exposed metal. Weathering powders or chalk pastels add dust, rust, and grime effects. The key is restraint, Skyrim’s aesthetic is worn but not destroyed.
Building Skyrim Armor: Step-by-Step Techniques
Creating Patterns and Templates
Patterns determine whether armor fits properly or becomes an uncomfortable mess. Start with body measurements, chest, waist, shoulders, thigh circumference, and arm length at minimum. Add 1-2 inches of tolerance for undergarments and movement. Tight-fitting armor looks impressive in photos but becomes miserable after four hours on a convention floor.
Patterning with duct tape remains the most reliable method for custom fits. Wrap duct tape around body sections (over old clothing), draw pattern lines with permanent marker, carefully cut free, and flatten pieces onto poster board. This creates accurate templates that account for individual body shapes rather than assuming average proportions.
Digital templates and pre-made patterns exist across the community. The extensive player resources available include downloadable foam patterns for popular armor sets. These save significant time but often require scaling and adjustment. Print a test piece first, verify dimensions, then commit to the full pattern.
Pepakura files offer another route, 3D game assets converted to unfoldable paper patterns. These provide extreme accuracy but demand patience when translating paper models to foam. Specialized forums and Discord servers share community-created Pepakura files specifically for Skyrim armor sets.
Always build mockups from cheap craft foam or cardboard before cutting final materials. Testing fit and proportion with throwaway materials prevents costly mistakes and material waste.
Assembling and Detailing Armor Pieces
Assembly starts with foam cutting. Use fresh blades and multiple light passes rather than forcing cuts, this prevents tearing and maintains clean edges. Beveling edges before assembly creates more convincing seams. A 45-degree bevel on connecting edges, when glued together, forms a V-groove that mimics metal panel joints.
Contact cement requires proper ventilation and technique. Apply thin, even coats to both surfaces, let dry until tacky (typically 5-10 minutes), then press together firmly. The bond is immediate and permanent, no room for repositioning. For adjustable joints, consider snaps, velcro, or elastic strapping that allows movement and repeated wear.
Heat shaping brings flat foam to life. Gentle, even heat causes foam to curl and conform. For compound curves like pauldrons or breastplates, heat small sections progressively while holding the desired shape until cooled. Over-heating causes bubbling and scorching, keep the heat gun moving and test on scraps first.
Detailing separates adequate builds from impressive ones. Layered foam creates raised designs and embellishments. Cut detail pieces from thin foam, glue them to base pieces, then seal and paint everything together. Contact cement thinned with acetone can be brushed onto foam to create carved texture effects that resemble leather tooling.
Battle damage adds realism. Carefully apply heat to create metal stress marks, use a Dremel or sandpaper to create scratches and gouges, then highlight these with metallic dry brushing. Skyrim’s design embraces asymmetrical wear, armor doesn’t degrade uniformly, so concentrate damage where it makes logical sense (edges, high-impact areas).
Crafting Authentic Skyrim Weapons and Props
Swords, Axes, and Melee Weapons
Weapon builds balance visual impact with convention safety requirements. Most conventions prohibit metal weapons and require prop checks, so construction materials matter. PVC pipe provides structural cores for swords and axes, lightweight, rigid, and easy to work with. Cut, sand, and wrap PVC with foam to build up blade shapes.
Daedric weapons feature curved, aggressive designs with distinctive shapes. Build the core shape from stacked EVA foam layers, carving and sanding to achieve smooth curves. The signature red glow effect can be achieved with translucent red acrylic paint over metallic base coats, or for extra wow factor, embed LED strips within hollow foam sections powered by coin cell batteries.
Iron and Steel weapons offer simpler construction, straight blades and basic cross guards. These work well for first weapon builds, teaching fundamental techniques without overwhelming complexity. Ebony weapons split the difference, distinctive purple-black color schemes and subtle curves that challenge skills without requiring expert-level fabrication.
For two-handed weapons like greatswords and warhammers, consider weight distribution. PVC or wooden dowel cores should extend the full length to prevent drooping or breakage. Balance weight toward the handle, a head-heavy warhammer might look impressive, but arm fatigue sets in quickly.
Painting metal effects requires layering. Base coat in black, dry brush with dark metallic (gunmetal or dark silver), then highlight edges with bright silver. A final dark wash settles into recesses, creating depth. For magical weapons, player strategies for builds often inspire weapon choices that match character concepts.
Bows, Staves, and Magical Artifacts
Bows present unique structural challenges. They need to look functional without being actual weapons. PVC or fiberglass rods provide flex and shape memory. Build up the bow body with foam, leaving the core flexible. Non-functional string made from paracord or elastic cord completes the look without creating a dangerous projectile weapon.
The Nightingale Bow remains popular, its elegant curves and purple accents make it instantly recognizable. The Dragonbone Bow offers dramatic visual presence with its massive, organic design. Reference screenshots from multiple angles before starting, Skyrim’s weapons look different from various perspectives, and in-game models sometimes have inconsistencies.
Staves allow more creative freedom since they’re inherently less weapon-like. A wooden dowel or PVC core wrapped in foam or Worbla creates the basic shape. Top pieces, crystals, skulls, or elemental effects, can be sculpted from foam clay, carved from high-density foam, or 3D printed if access exists.
For magical effects, consider practical lighting. EL wire creates glowing lines and runes with minimal power draw. LED strips provide brighter, more dramatic effects but consume more battery. Conceal battery packs in staff shafts or hide them in costume pouches.
Spell tomes, soul gems, and other small props add authenticity. Foam books with painted covers serve as spell tomes. Resin casting or carved foam with translucent paint creates convincing soul gems. These small details enhance photos and provide conversation starters at conventions.
Makeup, Wigs, and Character Transformation
Recreating Different Races with Makeup Effects
Race-accurate makeup transforms a costume from good to character-accurate. For human races like Nords and Imperials, focus on contouring to match character facial structures. Skyrim’s NPCs often have distinctive features, sharp cheekbones, prominent brows, that can be emphasized with contour and highlight.
Orc makeup requires full-face coverage. Use alcohol-activated body paints for durability, they resist smudging and last through full convention days. Apply green base tone evenly, then add darker green contouring around facial features to create depth. Tusks can be dental prosthetics (most comfortable), foam pieces held with spirit gum (budget-friendly), or costume teeth (quickest option).
Dark Elf grey skin demands careful color selection. Pure grey looks flat, mix in subtle blue or purple undertones for dimension. Bright red contacts complete the look, but test them before convention day to ensure comfort and verify they’re visible in photos. Some lighting conditions wash out subtle contact colors.
Khajiit and Argonian makeup becomes prosthetic work. Pre-made silicone masks offer quality but cost significantly. Foam latex prosthetics provide middle ground, affordable, lighter weight, and customizable. Full-face prosthetics require proper adhesion with prosaide or similar medical-grade adhesives, plus sealing edges with liquid latex to blend skin-to-prosthetic transitions.
For beast races, consider ventilation and visibility. Full masks restrict breathing and sight lines. Build in adequate eye holes, nostril openings, and consider mesh mouth sections for air flow. Convention floors get hot and crowded, comfort matters.
Styling Wigs and Facial Hair
Wigs handle Skyrim’s diverse hairstyles better than natural hair. Heat-resistant synthetic wigs allow styling with heat tools while remaining budget-friendly. For long, flowing styles like many Nord characters, start with wigs that already approximate the length and color, then customize with trimming and styling products.
Many Skyrim characters sport warrior braids and practical hairstyles. Create braids by sectioning the wig while it’s secured to a wig head. Use got2b Glued spray or similar strong-hold products to maintain style through convention wear. For messy, windswept looks, backcomb sections with a fine-toothed comb and lightly spray to lock in texture.
Facial hair ranges from short beards to long, braided styles. Crepe wool remains the traditional material, inexpensive and versatile. Layer thin sections onto skin using spirit gum, building up density and shaping as you go. Pre-made beard pieces exist but often look uniform and artificial. Hand-laid hair provides custom fit and natural appearance.
For elaborate bearded characters, consider that eating and drinking becomes challenging. Design facial hair to allow mouth movement or plan for strategic removal during meal breaks. Long beards also get caught in armor straps and weapon props, test the full costume together before debut.
Elf ears deserve mention as a crossover between makeup and prosthetics. Pre-made latex or silicone ears attach with spirit gum or prosaide. Color-match them to skin tone (or appropriate race tone) using alcohol paints or airbrushing. Poorly matched ears instantly break immersion.
Budget-Friendly Tips for Skyrim Cosplay Beginners
Budget constraints don’t prevent quality builds, they demand creativity and resource management. Start by prioritizing visible pieces. A impressive chest plate and helmet make more impact than complete leg armor that’s often hidden or less photographed. Build core pieces first, then expand the costume over time for future conventions.
Dollar stores and craft stores provide surprising resources. Foam sheet packs, cheap paintbrushes, and basic tools cost fractions of specialty cosplay suppliers. Floor mats from hardware stores work identically to branded cosplay foam at a third of the price. The material matters more than the branding.
Thrift stores offer fabric, leather belts (cut up for armor accents), and base clothing layers. An old leather jacket becomes bracers, belts, and strapping. Solid-colored shirts and pants serve as underlayers. Thrifting requires patience, visiting regularly increases chances of finding useful pieces.
Borrow or rent expensive tools rather than buying. Many maker spaces and libraries offer heat guns, Dremels, and other equipment for free or minimal fees. Community workshops allow access to advanced equipment like 3D printers and laser cutters without major investment.
Focus on paint technique over expensive materials. Careful layering, washes, and dry brushing make cheap foam look like aged metal. Time investment replaces material cost, additional hours practicing technique yield better results than premium supplies used poorly.
Skip lighting and electronics for first builds. They add complexity and cost. Solid builds with quality paint and weathering impress more than mediocre work with flashy LEDs. Master fundamentals first, advanced techniques come later.
Join community groups and forums. Experienced builders often sell leftover materials, share patterns, and offer advice. These resources prevent costly mistakes and connect beginners with mentorship opportunities. Following comprehensive gameplay approaches helps identify which armor sets and characters offer the best balance of visual impact and construction simplicity.
Simplify where possible. Not every armor variant requires exact screen accuracy. Strategic omissions and simplifications that maintain visual character while reducing complexity are smart choices. Convention attendees focus on overall impression, not whether rivet placement matches exact screenshot specifications.
Showcasing Your Skyrim Cosplay: Photography and Conventions
Quality photography immortalizes months of work. Location scouting matters, natural environments like forests, rocky terrain, or stone structures complement Skyrim’s Nordic aesthetic. Golden hour lighting (early morning or late afternoon) provides warm, dramatic illumination that enhances armor details and reduces harsh shadows.
Posing should reflect character personality. Warriors adopt aggressive stances with weapons ready. Mages might gesture as if casting spells. Thieves crouch or lean casually. Studying character idle animations in-game provides authentic pose references. Action shots mid-stride or mid-swing create dynamic images that stand out in crowded photo galleries.
Photographers experienced with cosplay understand the unique requirements, dramatic angles, props in frame, and editing that enhances without over-processing. Many conventions host photographer meetups where professionals shoot cosplayers for portfolio building. These free sessions provide professional-quality images.
Convention attendance puts builds in front of enthusiastic audiences. Pre-convention preparation prevents disasters, test wearing the full costume for several hours at home. Identify comfort issues, check for loose attachments, and practice moving in restricted visibility if wearing helmets or masks. Pack a repair kit with contact cement, spare foam, paint for touch-ups, and safety pins.
Convention etiquette includes respecting photo requests while maintaining personal boundaries. Cosplayers aren’t obligated to pose for every request, it’s perfectly acceptable to decline politely or request to finish current activities first. Setting specific photo times reduces interruptions during panel attendance or shopping.
Cosplay contests showcase builds competitively. Review contest rules carefully, many have specific requirements about construction techniques, documentation, and performance elements. Judges value construction quality, accuracy, and presentation. Practice stage presence if competing, walking confidently and incorporating character personality increases scores. Resources from role-playing game communities often discuss character presentation techniques that translate well to cosplay performance.
Social media extends a build’s reach beyond physical conventions. Quality photos with relevant hashtags connect with broader communities. Behind-the-scenes construction progress posts engage audiences and document the journey. Credit photographers and collaborate on posts, it benefits both parties through cross-promotion.
Network with other Skyrim cosplayers for group photos and collaborations. Faction group shots (all Dark Brotherhood, multiple Guild members) create impressive images and foster community connections. These relationships often lead to future collaborations, shared resource pools, and lasting friendships built on shared passion for the game and craft.
Conclusion
Skyrim cosplay combines craftsmanship, creativity, and community in ways few other franchises match. The game’s 15-year legacy has built an extensive knowledge base, patterns, techniques, and resources that make starting easier than ever. Whether tackling a first foam build or planning an elaborate Daedric armor project, the tools and community support exist to bring those Tamriel visions to life.
The key is starting. Pick a character that resonates, gather basic materials, and build one piece at a time. The journey from flat foam to finished armor teaches skills that extend beyond a single costume. Each project improves technique, expands capabilities, and prepares for more ambitious builds.
Conventions and photography sessions await completed projects, but the real reward comes from the building process itself, problem-solving construction challenges, watching pieces take shape, and embodying a character from a world that’s provided countless hours of adventure. The Dragonborn’s journey doesn’t end when the game closes. It continues every time someone straps on that armor and steps onto a convention floor.