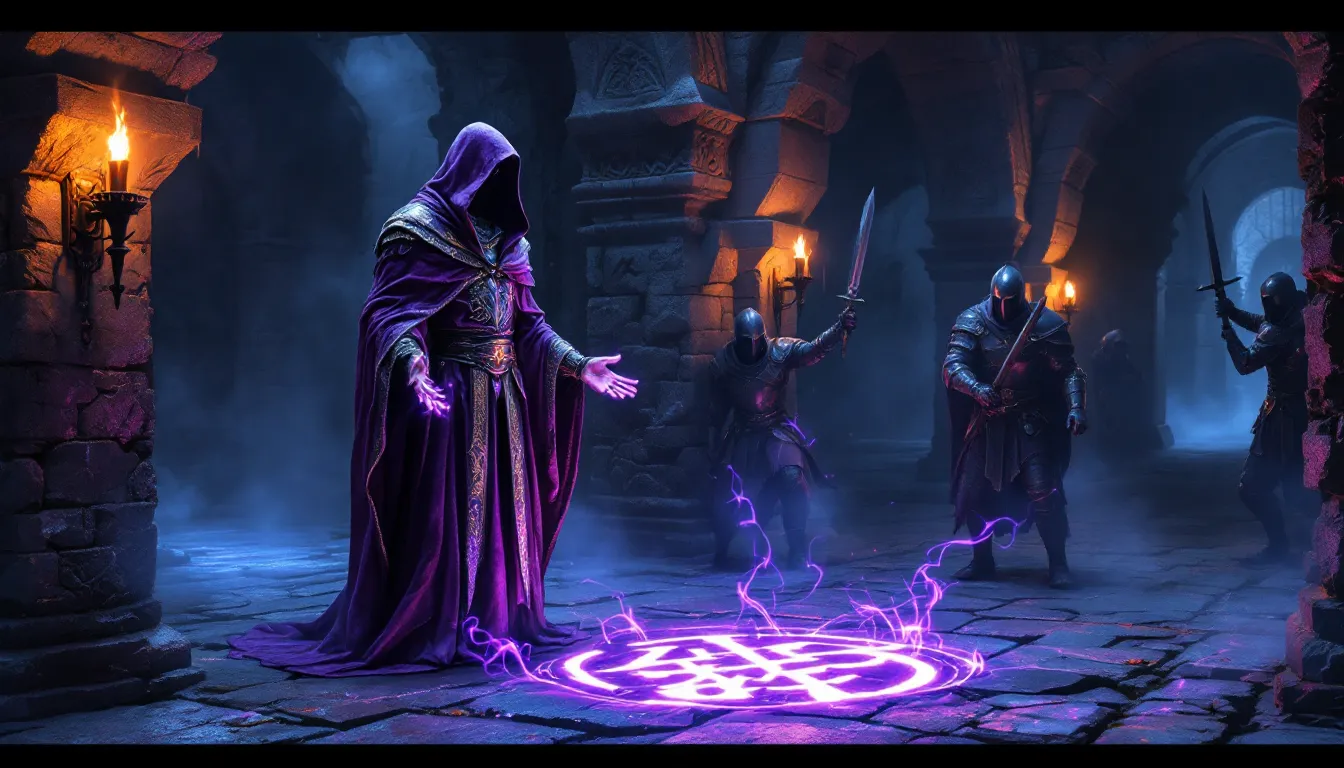
The final mission of the Dark Brotherhood’s main questline stands as one of the most memorable assassinations in Skyrim. “To Kill an Empire” sends players to assassinate Emperor Titus Mede II aboard his ship, the Katariah, marking the culmination of a conspiracy that’s been building since the player first joined the shadowy organization. It’s a mission that demands precision, whether players sneak through like a ghost or cut their way to the target.
This quest isn’t just about completing an objective, it’s about navigating a complex environment under pressure, making critical choices that affect the story, and dealing with the consequences of killing the most powerful man in Tamriel. The Katariah is filled with high-level guards, tight corridors, and multiple paths to the target, making it one of the more challenging assassination missions in the game. Players who rush in unprepared often find themselves overwhelmed, while those who approach strategically can turn this into a masterclass in stealth gameplay.
Table of Contents
ToggleKey Takeaways
- To Kill an Empire is the climactic Dark Brotherhood quest where players must assassinate Emperor Titus Mede II aboard the Katariah ship, requiring completion of the entire questline’s prerequisite missions.
- Stealth builds with Sneak 50+, Assassin’s Blade perks, and Dark Brotherhood armor enable the most elegant approach to eliminate guards one-by-one without raising alarms.
- The Katariah’s confined interior with 8-12 guards demands strategic preparation—using the anchor chain entry, exploiting shadows, and employing utility spells like Throw Voice to manage engagements successfully.
- Before boarding, equip essential items including Invisibility and Paralysis potions, Blade of Woe dagger, and Muffle-enchanted boots to significantly increase chances of mission success.
- After killing the Emperor, you must loot his body for the quest-required Signet Ring and plan an escape route, as the assassination itself doesn’t complete the mission until you reach shore.
- The Emperor’s final dialogue reveals he knows Amaund Motierre orchestrated the contract, and the follow-up quest Death Incarnate gives players a moral choice to either honor his dying request or spare the client.
What Is the “To Kill an Empire” Quest?
To Kill an Empire is the penultimate quest in the Dark Brotherhood questline, triggered immediately after completing “Hail Sithis.” The objective is straightforward: board the Emperor’s ship, the Katariah, and assassinate Emperor Titus Mede II. The ship is docked at the Solitude Harbor after the Emperor returns from his security detail following the failed assassination attempt at the wedding.
The quest represents the fulfillment of the Night Mother’s contract, the entire Dark Brotherhood storyline has been building toward this moment. Players receive the assignment from Astrid (posthumously, through her final wish) after dealing with the fallout of betrayal within the Brotherhood. It’s worth noting that this quest is part of the base game and available on all platforms: PC, PS4/PS5, Xbox One/Series X
|
S, and Nintendo Switch.
Unlike many Dark Brotherhood contracts that offer multiple entry points and environmental kills, this mission confines players to the ship itself. The Katariah is a unique location that players can only access during this quest, featuring a multi-level interior with crew quarters, a galley, and the Emperor’s private cabin. The confined space and high guard density make this one of the more intense assassination missions in the game.
The quest takes place regardless of player choices up to this point, there’s no way to avoid it if players want to complete the Dark Brotherhood storyline. But, what happens after the assassination offers a critical choice that affects the final quest.
Prerequisites and Requirements Before Starting
Completing the Dark Brotherhood Questline
Players must complete every prior Dark Brotherhood quest to unlock “To Kill an Empire.” The questline begins with Innocence Lost in Windhelm, where players speak to Aventus Aretino about killing Grelod the Kind. After completing that contract, players must sleep in any bed to trigger the kidnapping by Astrid and the subsequent invitation to join the Brotherhood.
The full prerequisite quest chain includes:
- Innocence Lost
- With Friends Like These…
- Sanctuary
- Mourning Never Comes
- Whispers in the Dark
- The Silence Has Been Broken
- Bound Until Death
- Breaching Security
- The Cure for Madness
- Recipe for Disaster
- To Kill an Empire (unlocks after completing Hail Sithis.)
There’s no way to skip ahead or access this quest without completing the entire chain. Players who destroyed the Dark Brotherhood by killing Astrid during “With Friends Like These…” cannot access this quest at all, that choice locks players out of the entire faction questline permanently.
Recommended Level and Skill Requirements
While the quest technically has no level requirement, the Katariah is populated with high-level guards ranging from level 20 to 35. The Penitus Oculatus Agents aboard are tougher than standard guards and hit hard in melee combat. Players attempting this quest below level 20 will struggle significantly, especially if they lack proper equipment or skill investment.
For stealth builds, having Sneak at 50+ with perks like Backstab (x6 damage multiplier) or Assassin’s Blade (x15 with daggers) makes the mission considerably easier. The Muffle spell or enchantment is almost essential, as the wooden ship floors amplify footstep sounds. Players focusing on advanced stealth techniques will find their preparation pays off here.
Combat-focused characters should have at least 300+ health and strong armor rating (200+) to survive direct confrontations with multiple guards. One-handed or two-handed weapon skills at 60+ with damage-boosting perks help end fights quickly before reinforcements arrive. The cramped corridors make crowd control difficult, so high DPS matters more than defensive positioning.
Step-by-Step Walkthrough: To Kill an Empire
Entering the Katariah and Boarding Strategy
The Katariah is anchored at the Solitude docks near the East Empire Company warehouse. The ship’s gangplank is guarded by a single Penitus Oculatus Agent who must be dealt with first. Stealth characters can crouch and move along the dock’s edge, staying in shadow, and either pickpocket the guard or perform a stealth kill before he raises the alarm.
Alternatively, players can swim around to the anchor chain on the ship’s port side. Climbing the chain bypasses the gangplank guard entirely and provides direct access to the ship’s exterior deck. This is the optimal entry point for stealth builds, as it places players near a hatch leading directly below deck while avoiding the main deck’s patrol routes.
Once aboard, the main deck features 2-3 roaming guards and the Captain, who doesn’t engage in combat unless provoked. The upper deck has limited cover, making daytime infiltration risky. Players can wait until nightfall (9 PM – 6 AM) for reduced visibility, though guard patrol patterns remain consistent regardless of time.
The ship has three entry points into the interior:
- Main cabin door (center deck, heavily trafficked)
- Hatch near the bow (leads to lower crew quarters, fewer guards)
- Captain’s cabin (aft deck, connects to upper officer quarters)
The bow hatch offers the safest entry for stealth players, dropping them into a corridor with minimal guard presence and direct access to the galley.
Navigating the Ship and Dealing with Guards
The Katariah’s interior is divided into three sections: the lower crew deck, the galley/dining area, and the upper officer quarters where the Emperor resides. Navigating requires either eliminating or avoiding approximately 8-12 guards depending on the path taken.
Lower Crew Deck: This area contains hammocks, storage, and 2-3 guards on patrol. The lighting is dim, providing excellent concealment for stealth characters. Crouching behind barrels and crates allows players to move through undetected. The Invisibility potion or spell trivializes this section, though timing matters, guards will investigate if they hear doors opening or items being knocked over.
One effective tactic involves using Fury or Frenzy spells to turn guards against each other, letting them thin their own numbers. This works particularly well in the galley, where 3-4 guards often congregate near the dining table. Cast Frenzy on one guard, retreat, and let the chaos unfold.
Galley and Dining Hall: The central hub connects all ship sections and is the most dangerous area. Multiple guards pass through regularly, and the open layout offers minimal cover. Stealth players should stick to the perimeter, using the support beams and furniture for concealment. The galley contains health and stamina potions in barrels, worth grabbing if supplies are low.
Upper Officer Quarters: The Emperor’s cabin is located aft on the upper deck, accessible via a staircase from the galley or through the captain’s cabin entrance. This area has 2-3 high-level guards stationed outside the Emperor’s door. These guards don’t patrol, they stand watch, making stealth kills risky unless players have Shadow Warrior (Sneak perk that allows entering sneak mode during combat) or a similar ability.
A ranged distraction helps here. Casting a spell or shooting an arrow into a side room can pull one guard away, allowing players to eliminate them individually. The Throw Voice shout (Fus Ro Dah’s lesser-known cousin, learned from the words Zul, Mey, Gut) is purpose-built for this scenario, it creates a noise at a targeted location without revealing the player’s position.
Confronting Emperor Titus Mede II
The Emperor waits alone in his cabin, seated at a desk. Unlike most assassination targets, Titus Mede II doesn’t fight back. When the player enters, he initiates dialogue, acknowledging his fate and showing no fear. He knows why the player is there and accepts death with dignity.
Players can speak with him or immediately attack. The conversation reveals crucial information: the Emperor knows someone wants him dead, but he doesn’t know who contracted the Dark Brotherhood. Before dying, he makes a request, kill the person who ordered his death. He even provides details, mentioning that the real architect of his assassination will contact the player after the deed is done.
This conversation is worth having for roleplaying purposes and sets up the final quest, though it’s skippable. Once the Emperor is dead, players must loot his body to obtain the Emperor’s Signet Ring (quest item) and whatever personal effects he’s carrying (typically 200-400 gold, some gems, and sometimes enchanted jewelry).
After the kill, players need to escape the ship. Guards don’t automatically become hostile after the assassination, only if they detect the player during the escape. The fastest exit is jumping off the stern and swimming to shore, though this requires dealing with any guards between the cabin and the deck. Alternatively, players can retrace their entry route if they cleared it thoroughly on the way in.
Fast travel becomes available once players leave the ship, making extraction easy if they reach shore undetected.
Best Character Builds and Strategies for Success
Stealth Assassin Approach
The stealth approach is the intended design for this quest and offers the smoothest experience. A proper stealth build should focus on Sneak, Archery or One-Handed (daggers), and Illusion magic. The following perks and equipment create an optimal assassin:
Essential Perks:
- Backstab (Sneak 30): 6x damage with one-handed sneak attacks
- Deadly Aim (Sneak 40): 3x damage with bow sneak attacks
- Assassin’s Blade (Sneak 50): 15x damage with dagger sneak attacks
- Muffled Movement (Sneak 30): Reduces noise by 50%
- Silence (Sneak 100): Makes movement completely silent (endgame perk)
- Quiet Casting (Illusion 50): All spells are silent to others
Recommended Equipment:
- Dark Brotherhood Shrouded Gloves: Doubles sneak attack damage with one-handed weapons (stacks multiplicatively with Assassin’s Blade for 30x damage)
- Nightingale Boots or Shrouded Boots: Muffle enchantment
- Nightingale Armor or Shrouded Armor: Improves sneak and provides solid armor rating
- Blade of Woe: Best assassination dagger (12 base damage, absorb 10 health)
- Invisibility potions: 2-3 for emergency resets
- Paralysis poisons: Incapacitate targets before killing them
The strategy is methodical: enter via the anchor chain, move through lower decks eliminating guards one by one with stealth kills, and reach the Emperor without raising an alarm. With Assassin’s Blade and Shrouded Gloves, even high-level guards die instantly to backstabs. The entire mission can be completed without ever entering combat, which many players consider the “perfect” run.
Illusion Support: Casting Muffle before boarding (if not using enchanted boots) and using Invisibility when caught creates a safety net. Calm can de-escalate situations if a guard spots the player mid-stealth kill, though it requires investment in Illusion perks to affect higher-level enemies.
Combat-Focused Strategies
Warrior builds can brute-force this mission but should expect a challenging fight. The tight corridors favor enemies, multiple guards can attack simultaneously while the player struggles to maneuver. Success depends on controlling engagement distance and preventing being surrounded.
Heavy Armor Build:
- Armor Rating: 400+ to minimize physical damage
- Weapon: Two-handed weapons for crowd control, or sword-and-shield for survivability
- Restoration: Fast Healing or Close Wounds for in-combat recovery
- Shouts: Unrelenting Force (Fus Ro Dah) to knock enemies back and create space
Key Tactics:
- Bottleneck Fighting: Stand in doorways to limit enemy approach angles. Guards can’t swarm if they can only attack one at a time.
- Power Attacks: Use stamina for power attacks to stagger enemies and interrupt their swings.
- Health Potions: Carry 10+ health potions and set them to hotkeys. Combat is fast and unforgiving.
- Atronachs: Summoning a Storm Atronach or Dremora Lord divides enemy attention and provides damage support.
Magic-focused builds can use Destruction magic (Lightning spells for faster casting) combined with Wards (Restoration) to absorb damage while dealing consistent DPS. The confined spaces make AoE spells less effective, so single-target damage matters more. Fireball can hit multiple enemies in tight groups, but risks friendly fire if the player isn’t careful about positioning.
Essential Items, Potions, and Equipment
Preparation significantly impacts success rates for “To Kill an Empire.” The right consumables and equipment can turn a difficult mission into a manageable one, especially for players tackling this quest at lower levels or with sub-optimal builds.
Potions (bring at least 5-7 of each category):
- Invisibility: Emergency escape when detected. Can be spammed if carrying multiple to reset aggro entirely.
- Healing: Especially for combat builds. Potions of Vigorous/Extreme Healing restore 120-180 health instantly.
- Stamina: Power attacks and sprinting drain stamina fast in combat. Potions of Vigorous Stamina restore 120+ stamina.
- Fortify Sneak: Adds +30-60 Sneak skill for 60 seconds, improving detection thresholds significantly.
- Paralysis Poisons: Applied to daggers or arrows, these incapacitate targets for 5-15 seconds, allowing free kills.
- Fortify One-Handed/Archery: Boosts damage output by 30-50% for 60 seconds.
Essential Equipment:
- Dark Brotherhood Gear (full set): Shrouded Hood, Armor, Gloves, and Boots provide the best stealth bonuses in the game. The gloves’ double sneak attack damage is irreplaceable for assassins.
- Nightingale Gear (alternative): Obtained during the Thieves Guild questline. Provides similar stealth bonuses with better armor rating and enchantments that scale with level.
- Blade of Woe: Obtained by killing Astrid or pickpocketing her during “With Friends Like These…” Best dagger for assassinations (12 base damage, 10 health absorb).
- Mehrunes’ Razor: Daedric artifact dagger with 1.98% chance to instantly kill any enemy. While unreliable, it can proc on the Emperor himself for an instant, dramatic kill.
- Bow with high base damage: Ebony Bow or better, enchanted with Absorb Health or Chaos Damage for maximum DPS.
Enchantments to Prioritize:
- Muffle on boots (mandatory for stealth)
- Fortify Sneak on armor pieces
- Fortify One-Handed/Archery on gloves, ring, and necklace
- Regenerate Health on armor for passive healing between engagements
Food Buffs: Often overlooked, food provides lasting buffs that stack with potions. Elsweyr Fondue grants +100 Magicka and 25% Magicka Regen for 12 minutes. Venison Stew provides +1 Stamina Regen per second for 12 minutes. These buffs persist through the entire mission if consumed before boarding.
For players interested in broader preparation tactics across various missions, exploring different strategic approaches can provide additional insights into optimizing loadouts and resource management.
Common Mistakes and How to Avoid Them
Several recurring mistakes trip up players during “To Kill an Empire,” often turning what should be a surgical assassination into a chaotic fight for survival. Avoiding these pitfalls makes the quest significantly smoother.
Rushing the Entry: Players who sprint up the gangplank without scouting alert guards immediately. The opening guard has line-of-sight down the dock, approach slowly, stay crouched, and wait for patrol patterns. Alternatively, use the anchor chain method to skip the problem entirely. Patience in the first 30 seconds saves a world of frustration.
Ignoring Quicksaves: The Katariah is unforgiving. Quicksave before every major action, boarding, entering new ship sections, initiating assassinations. Getting detected by one guard can snowball into fighting the entire crew. Quicksaving provides checkpoints to retry different approaches without restarting from the dock. Press F5 on PC, or assign quicksave to hotkeys on console if available through settings.
Poor Lighting Awareness: The ship’s interior has varied lighting, shadows near walls and corners provide concealment, while standing in candlelight or lantern glow reveals the player. The detection eye indicator shows visibility level (empty = hidden, partially filled = visible). Even with high Sneak skill, standing in direct light near guards leads to detection. Stick to dark areas and use them as cover when guards patrol nearby.
Fighting in Open Areas: If combat starts in the galley or on the main deck, players face multiple enemies at once. These areas offer minimal cover and allow guards to surround the player. If forced into combat, retreat to corridors or cabins where engagement can be controlled. Doorways create natural bottlenecks that prevent being overwhelmed.
Forgetting to Loot the Emperor: The Emperor’s Signet Ring is a quest item required to complete the mission. Looting his body is mandatory, players who kill him and immediately flee must return to collect it. Also, the Emperor carries valuables worth collecting. Take everything before leaving the cabin.
Not Using Shouts: Many players forget about Throw Voice (Zul Mey Gut), which is specifically designed for stealth gameplay. It creates a noise distraction at range, pulling guards away from their posts without revealing the player. This shout makes the upper officer quarters significantly easier to navigate. Players who haven’t collected all three words should grab them from Shearpoint, Shriekwind Bastion, and Labyrinthian.
Underestimating Escape: Killing the Emperor doesn’t complete the quest, players must escape the ship. Some players celebrate too early and get killed during extraction. Plan the escape route before killing the Emperor. Clear a path, leave a door open, or have an Invisibility potion ready. Fast travel isn’t available until fully off the ship and on solid ground.
Attacking Before Dialogue: While skipping the Emperor’s conversation is mechanically possible, it costs players important narrative context and immersion. The dialogue is brief and provides motivation for the next quest. Players who want the full Dark Brotherhood experience should let Titus Mede II speak his final words before striking.
Quest Rewards and What Happens Next
Completing “To Kill an Empire” rewards players with 3,000 gold from Nazir upon returning to the Dark Brotherhood Sanctuary. This is one of the larger cash rewards in the questline, though it pales compared to other methods of making money in Skyrim. The real reward is narrative progression and access to the final quest.
Also, players keep whatever they loot from the Katariah, guards carry decent amounts of gold (20-50 each), and the ship contains several lootable chests with weapons, armor, and consumables. The Emperor’s Signet Ring itself has no special enchantments and is purely a quest item, though some players keep it as a trophy using console commands or mods to make it droppable.
Radiant Quests Unlock: After completing “To Kill an Empire,” Nazir offers infinite Dark Brotherhood radiant quests similar to the initial contracts. These involve assassinating randomly generated targets across Skyrim for gold rewards (100-300 gold per contract). While these don’t advance the storyline, they provide ongoing income and roleplaying opportunities for players who want to continue operating as an assassin.
Sanctuary Upgrades: With the main questline complete, players can access upgrades to the Dawnstar Sanctuary (unlocked during an earlier quest). These are purely cosmetic and functional additions purchased from Delvin Mallory in the Ragged Flagon, including a torture chamber, additional containers, and aesthetic improvements.
The Mysterious Letter and Hail Sithis
After reporting the Emperor’s death to Nazir, a mysterious courier approaches the player a short time later (usually 24-48 in-game hours). The courier delivers a Sealed Letter from an unknown sender. According to many game guide resources, this letter reveals the identity of the person who contracted the Emperor’s assassination, the very person Titus Mede II asked the player to kill.
The letter triggers Death Incarnate (technically the true final quest), which involves tracking down Amaund Motierre, the nobleman who set the entire Dark Brotherhood plot in motion. The Emperor’s dying request was to kill Motierre, presenting players with a moral and practical choice: honor the Emperor’s final wish, or let Motierre live and collect the final payment.
Killing Motierre is optional but rewarded. Players who eliminate him can loot the Jeweled Amulet (valued at 2,000 gold) and 20,000 gold from his payment chest. This brings the total payout for the questline to astronomical levels, though it means betraying the client, something the Dark Brotherhood historically avoids, as it damages their reputation.
Conversely, players who spare Motierre and collect the payment maintain professional assassin etiquette. The Brotherhood doesn’t penalize either choice mechanically, leaving it as a purely roleplaying decision. Most players kill Motierre because the Emperor was more sympathetic and honorable than the scheming noble, and the extra gold doesn’t hurt.
Alternative Choices: Can You Spare the Emperor?
Short answer: No. The game provides no option to spare Emperor Titus Mede II or complete the quest without killing him. Attempting to leave the cabin without assassinating him leaves the quest incomplete, and players cannot progress the Dark Brotherhood storyline.
This differs from quests like the ending of “With Friends Like These…” where players can choose to destroy the Dark Brotherhood instead of joining. By the time players reach “To Kill an Empire,” they’re fully committed to the faction and its objectives. The Emperor must die for the story to continue.
Some players have attempted workarounds using console commands on PC to advance the quest stage without killing the Emperor, but this breaks subsequent quests and often causes bugs. SetStage commands can technically skip the assassination, but the game expects the Emperor to be dead for later dialogue and events to make sense.
Roleplaying Alternatives: Players uncomfortable with assassinating the Emperor can rationalize the choice in-character. The Emperor himself accepts his fate without resistance, suggesting he understands the political realities of Tamriel. Some view the assassination as mercy, Titus Mede II faces the end with dignity rather than living through the political fallout of his failed security.
Others roleplay their character having a crisis of conscience after the deed, which influences whether they kill Motierre during the follow-up quest. Sparing Motierre can represent the player character’s refusal to continue the cycle of political assassination.
Mod Solutions: For PC players, several mods on popular modding platforms offer alternate endings to the Dark Brotherhood questline. Some allow players to spare the Emperor, fake his death, or even turn against the Dark Brotherhood at this critical juncture. These mods rewrite quest stages and add new dialogue, providing options that don’t exist in the vanilla game.
For console players on PlayStation or Xbox, no such options exist without access to console commands or external mods. The quest must be completed as designed. Players who absolutely cannot reconcile the assassination with their character concept have one option: abandon the Dark Brotherhood questline entirely and leave it incomplete.
Tips for Roleplaying and Immersion
“To Kill an Empire” offers rich roleplaying opportunities beyond the mechanical execution. The Dark Brotherhood questline explores themes of loyalty, betrayal, and the moral ambiguity of assassination-for-hire. Players who engage with these themes create more memorable playthroughs.
Consider Your Character’s Motivation: Why did your character join the Dark Brotherhood? Are they a true believer in Sithis and the Night Mother, or simply a mercenary seeking gold and power? This context shapes how they approach killing the Emperor. A devout follower sees this as sacred duty: a mercenary might hesitate when faced with the Emperor’s calm acceptance of death.
Engage with the Emperor’s Dialogue: Titus Mede II’s final conversation is some of the best writing in the Dark Brotherhood questline. He doesn’t beg or threaten, he acknowledges the player as a professional doing their job. His request to kill Motierre reveals political savvy and shows he understands the game being played around him. Take time to listen and consider the implications before striking.
Dress the Part: Wear full Dark Brotherhood armor for this mission rather than optimized endgame gear. The Shrouded Hood and robes create a more immersive experience than wandering into the Emperor’s cabin wearing Daedric armor or the Archmage’s robes. This is a Dark Brotherhood contract, look like an assassin of the Night Mother.
Use Appropriate Weapons: Killing the Emperor with the Blade of Woe, the signature weapon of the Dark Brotherhood, feels more narratively appropriate than using a random enchanted dagger or a sword. Similarly, if playing an archer, use a bow rather than magic. The Brotherhood has traditions, and this is the most important contract in their history.
Time Your Strike: Some players wait until the Emperor finishes speaking, then kill him with a single stealth attack while he’s still seated. Others prefer to stand before him, announce the name of Sithis, and strike face-to-face as a mark of respect. Either approach creates a cinematic moment that random combat slashing doesn’t achieve.
Read In-Game Books: The Dark Brotherhood’s history is explored in books like Fire and Darkness: The Brotherhoods of Death and the Night Mother’s Truth. Reading these before or during the questline deepens understanding of the faction’s philosophy and why contracts like this matter to them.
Consider the Political Impact: In the broader Elder Scrolls lore, assassinating the Emperor has massive implications for the Empire’s stability. Players familiar with RPG storytelling conventions often speculate about how this event influences the Second Great War with the Aldmeri Dominion. While Skyrim doesn’t show these consequences directly, thinking about them adds weight to the decision.
Roleplay the Aftermath: After completing the quest, how does your character react? Do they celebrate their success, or feel guilt? Visiting the Temple of the Divines in Solitude or lighting candles for the Emperor creates a personal moment. Some players have their characters retire from active assassination work after this, taking only Nazir’s radiant quests occasionally rather than pursuing murder full-time.
Alignment with Other Questlines: Characters who’ve completed the Companions questline and cured their lycanthropy might view the Dark Brotherhood differently than those who embrace their inner monster. Similarly, players who’ve become Thane of Solitude and sworn loyalty to Jarl Elisif (who served under the Emperor) face interesting cognitive dissonance. These conflicts create richer character narratives than treating every questline as isolated content.
For players seeking to enhance their overall experience with nuanced approaches to various questlines and moral choices, exploring comprehensive planning resources can provide valuable perspective on building cohesive character arcs across multiple faction storylines.
Conclusion
“To Kill an Empire” stands as one of Skyrim’s most meticulously designed assassination missions, rewarding preparation and player choice while delivering a narratively significant moment in the Dark Brotherhood storyline. Whether players approach it as a ghost, eliminating guards silently in the shadows, or as a warrior carving a bloody path to the Emperor’s cabin, the mission accommodates multiple playstyles while maintaining its core tension.
The quest’s greatest strength lies in its aftermath, the conversation with Emperor Titus Mede II and the subsequent choice about Amaund Motierre. These moments elevate the mission beyond a simple “go here, kill target” objective and ask players to consider the consequences of their actions within the political landscape of Tamriel. It’s a rare instance where Skyrim trusts players to make meaningful choices without obvious “correct” answers.
For players tackling this quest for the first time or returning after years away, the core advice remains consistent: prepare thoroughly, respect the Emperor’s final words, and choose an approach that aligns with your character’s arc. The Dark Brotherhood questline peaks here, before the final cleanup mission, making it the true climax of one of Skyrim’s most memorable faction storylines. Whether your assassin serves Sithis with religious devotion or simply sees this as the biggest contract of their career, “To Kill an Empire” delivers a satisfying payoff to hours of buildup, and the lessons learned boarding the Katariah translate to countless other challenges across Skyrim and beyond.